FILM STUDIES
- Home
- Course Resources
- Homework/EC
- Projects
- Sound/Editing/Music
- Screenwriting/Storyboarding
- Story/Structure/Form
- Genres
- Film History
- Cinematography/Art Direction
- Film Narrative/Analysis
- Special Effects
- Film Prod/Directors/Distribution
- Film Sites/Blogs
- Coming Soon
- FILM CLUB
- WEBSITE UNDER CONSTRUCTION!
Baz Luhrmann's The Great Gatsby's Amazing CGI Transformation
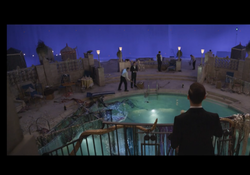
VFX supervisor Chris Godfrey's CGI sizzle reel shows before-and-after scenes from Baz Luhrmann's The Great Gatsby showing how blue and green screens were transformed into the film's detailed settings.
During a three-minute clip (view below), soundtracked by Lana Del Rey's "Young and Beautiful," which was used in the film, raw footage of Leonardo
DiCaprio, Tobey Maguire, Carey Mulligan and the rest of the cast walking, talking and pretending to drive by green and bluescreens is interspersed with scenes from the film. It's revealed that DiCaprio and Maguire were filmed in Gatsby's yellow car surrounded by bluescreens for one of their trips into New York City in the film.
Another shot shows DiCaprio and Maguire walking down a pier, completely surrounded by bluescreens. In the film, you can see the water and Gatsby's estate behind them. The Buchanans' lavish property also was largely created using special effects. To see the rest of the movie magic unfold, check out the video below.
The Great Gatsby VFX from Chris Godfrey on Vimeo.
The Camera That Made "Avatar" Possible
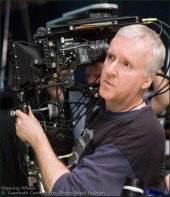
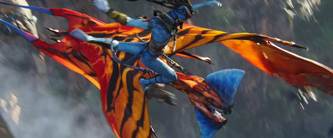
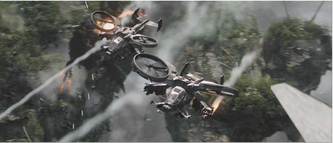
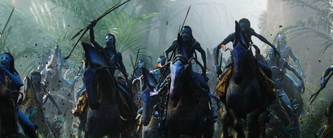
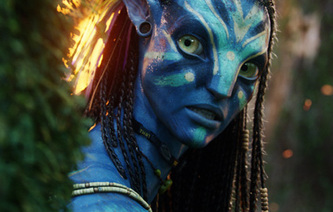
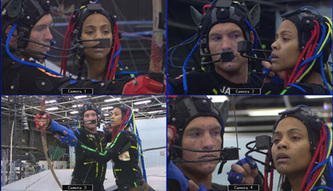
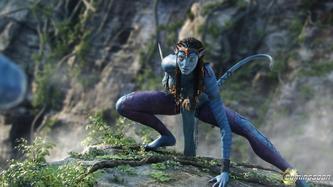
The camera, informally nicknamed theSteering Wheel or Virtual Camera, was like a steering wheel that had an LCD monitor. It doesn't actually have a camera, it only has motion control data so as Cameron looked through what was equivalent to the viewfinder, he saw Pandora, the Na'vi, the Avatars, in real time and with no lag. It allowed him to treat the process like a live action shoot. The Steering Wheel was created specifically for this film, as was much of the technology, including the practical 3D camera. The Virtual Art Department (VAD) would come up with an environment for a certain scene, then Cameron would use the Steering Wheel to walk around the environment with his art department crew and point out needed adjustments, like moving a particular tree so he could shoot from a preferred angle.
Download Avatar Worksheet
by clicking on the link below
Download Avatar Worksheet
by clicking on the link below
| avatar.docx | |
| File Size: | 522 kb |
| File Type: | docx |
The VAD artists sat on stage with him so they could immediately move the assets on Cameron's request. It allowed him to scout the location of the digital set with the camera using similar methodologies as if it were a live-action shoot, and the equivalent of telling a Greens Department how he wanted to dress out the scene. It was like a live action movie with all the benefits of a CG movie. "Doing everything in 3D had a big impact on our methodology," said Saindon. Because Avatar is a 3D movie all the fluid sims and explosions had to be in volumetrics, from fire and smoke to water. "Usually we shoot everything; we go to the back lot, shoot FX and slap them in.
In this movie I don't think we used any practical effects, everything we did was done in 3D and rendered. We've pushed the dynamic effects a lot further on this movie than we have in the past," Saindon explained. "We could no longer cheat, we couldn't use actual footage.
In this movie I don't think we used any practical effects, everything we did was done in 3D and rendered. We've pushed the dynamic effects a lot further on this movie than we have in the past," Saindon explained. "We could no longer cheat, we couldn't use actual footage.
"Jim was very smart at the interoccular and convergence. In a wide shot he set it very narrow; in wide shots you don't see a huge amount of 3D. In a close shot, he would set the IO a little wider. He didn't go crazy with the convergence, he didn't try to pull things off the screen. He set your eye where it needed to be for the shot and didn't try to go crazy with the 3D gags. I always felt 3D was a gimmick, I figured if the movie wasn't good enough to hold up in 2D I wouldn't bother. I have to say the 3D that Jim came up with is drastically better than anything I've seen."
I have to agree. When, on the first sortie, they leave the human outpost called Hellsgate and enter the jungle, pilot Trudy Chacon, played by the feisty actor Michelle Rodriguez, comments, "You should see your faces." I am sure I wore the same expression. It makes you wonder which side of the gate heaven and hell is on.
I have to agree. When, on the first sortie, they leave the human outpost called Hellsgate and enter the jungle, pilot Trudy Chacon, played by the feisty actor Michelle Rodriguez, comments, "You should see your faces." I am sure I wore the same expression. It makes you wonder which side of the gate heaven and hell is on.
The Many Uses of Green Screen: Virtual Backlot Demo
"What You See Isn't Always What You Get" is a demo reel for Stargate Studios, a visual effects company that specializes in virtual backlots. Much of the footage that appears in the demo comes from TV shows like "Ugly Betty", "Grey's Anatomy", and "Heroes", but the same green screen techniques are used in motion pictures as well. If you didn't think green screen was used that often, just watch this and you'll be amazed.
IRONMAN 1 & 2
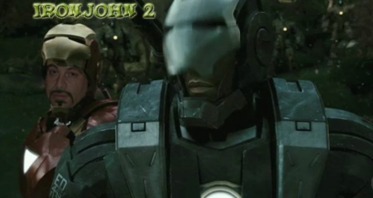
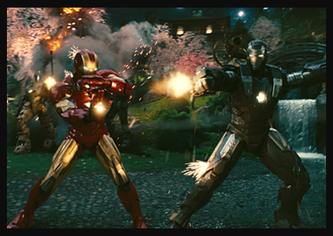
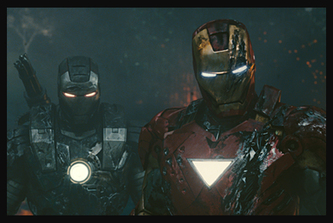
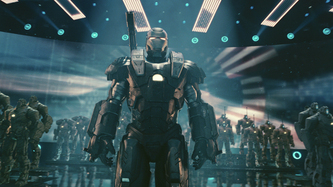
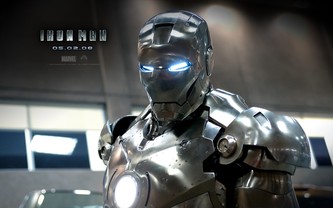
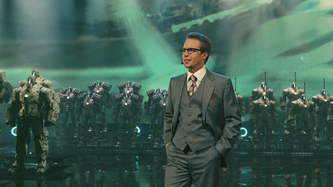
For Iron Man 2, director Jon Favreau not only wanted to ramp up the jeopardy and emotional crises for his armed and animated superhero, but also the action, too. Thus, there's the addition of pal Rhodie as War Machine (Don Cheadle) as well Whiplash (Mickey Rourke) and military drones created by arch rival Justin Hammer (Sam Rockwell). ILM worked on 535 out of 1,000 shots, collaborating with ILM Singapore (under the leadership of Mohen Leo), which contributed roto, layout, matchmove
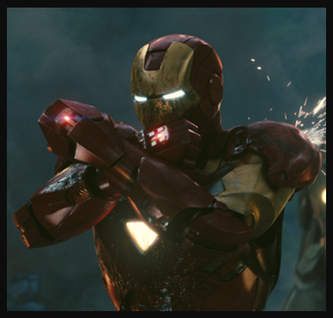
suit animation and compositing throughout. ILM also worked directly with Embassy Effects, Trixter and Pixomondo. However, Janek Sirrs, the overall visual effects supervisor, contracted several other studios for additional work, including Double Negative, Legacy, Pixel Liberation Front, Fuel, Lola, Evil Eye, Goat, Svengali, The Third Floor, Prologue, Hydraulx and Perception, among others. "Jon was more aware of how we were able to get to the suits so we were a lot closer for a lot longer," states Ben Snow, visual effects supervisor for Industrial Light & Magic. "Basically, all but three or four of the shots where the helmet's shut are completely CG. And then when the helmet's open in the house fight between Iron Man and War Machine, it's often using a partial suit that Legacy Effects created but then extending that with arm bits and other bits and sometimes the whole suit replaced, depending on the shot. We were also able to use some of the new lighting tools that we started developing on Terminator Salvation and did a lot of work to make that a more usable and real world-like [system] for Iron Man. We were able to leverage the improvements in lighting to give us a bit more creative freedom."
Indeed, that's probably the biggest breakthrough for ILM on Iron Man 2: On Terminator Salvation, the studio integrated an energy conserving shader set in RenderMan in conjunction with an HDRI lighting approach to get rendered images with a more believable real world look. The system is called Energy Conserving Image-Based Important Sampled Lighting and what it means is "that the way we're lighting the CG suit is a lot more like the way the DP [Matthew Libatique] lights the real suit and we're using photographs of his to light the CG suits and bounce lights and flags to flag off lights. And what we found in practice is that we go from zero to real a lot more quickly and so we were able to focus on the aesthetic stuff: How do we make it look more beautiful and tweak the lighting so it fits in better?"
For example, when you have such a reflective silver suit during the house fight, Doug Smythe, the digital production supervisor, helps make it easier for the TDs to create a dynamic environment map to include not only the other character but also his shadows as well. "We're still dealing with expensive ray tracing and expensive indirect," Snow adds. "We're still in RenderMan, but for some of it we used mental ray. I actually lit a shot myself during the freeway chase, and it was, to my mind, a lot more intuitive, much more like what I'd see on set using the lights. What's interesting for a lot of the artists is they're so used to using spotlights and ambient occlusion that it's conceptually weird to them initially. You're so used to the cheats. A lot of times a CG artist will turn off expediential fall off or real world-type fall off on the light so it doesn't dim out properly as you get farther away. Well, in this lighting skill, we don't have that control: if it's going to fall off, you have to boost the light's intensity, as we do on set. It does require you to think more physically correctly, but I do think that contributes to everything feeling more realistic."
Tasked with bigger and more complex action sequences, ILM used a bigger box of tools in terms of simulations, fluids and destruction. "We leveraged improvements we've made to our internal sim engines, so we had the hydraulic fluids during the end fight and we had to add water droplets on the suits as they roll around in the water, so that's using some of the PhysBAM stuff that's getting better," Snow continues. "For the fireplace explosion, we were also able to build on some practical elements with some fluid-simulated fire where the two suits face off against one other and the RTs interact to make the effect of where the air vaporizes and create a shockwave.
The other key leverage opportunity was a greater use of Nuke and its 3D compositing capabilities, which allowed ILM to blur the line between digital mattes and compositing a lot more. This was important because there were a lot more synthetic environments and environment extension such as the climactic battle in the Japanese Garden (shot in LA) where Iron Man and War Machine face off against the drones and Whiplash.
"Out of the box, the compositor could start out with a pretty nice smoky-looking environment and mix that with volumetric-type effects for god rays coming through the smoke and rendered 3D atmospherics to create a texturally dense and interesting [look]," Snow explains. "It freed us up to make some more creatively interesting environment work." Favreau was also encouraging about ILM's involvement in the art direction, including the arsenal of weapons for War Machine and the drones created by Bruce Holcomb, the model supervisor, and Aaron McBride, the VFX art director.
"Weapons for War Machine and Hammer drones were based on real modern weapons and ILM created style sheets, particularly since the drones were associated with a branch of the services," Snow suggests. "The Naval drones had mounted missiles similar to what you'd find on battleships; and the Air Force drones, they'd be based on a sidewinder missile. The looks of the suits were based on the branch of service as well. For the Air Force drone, they went with an F22 stealth paint look that's completely non-reflective and allows the plane to not be radar-detected. But it was so well camouflaged that you couldn't see it in shots. So we had to go back and actually dumb-down the materials just a bit and made it more reflective than you actually want if you're trying to hide your Air Force drones. The signatures of the weapons -- the muzzle flashes, tracers and the look of explosions -- were a challenge, too." Meanwhile, Marc Chu, the animation supervisor at ILM, was tasked with better performances. "We couldn't really see their faces, so [we] worked on making their fighting styles very distinctive and making them act like different characters," Chu says. "Iron Man (who's refined in a completely new suit and has more over-the-top weapons) was the most nimble and flexible of the group whereas War Machine was more brute force. And with Whiplash, we wanted to emphasize the whips and did a lot reference for that. We really wanted to go for a samurai-like feel, reusing drone armor [for the final battle]."
ILM made full use of Imocap this time. "It's tough to meld a performance of Robert with a CG suit and make it look natural, especially when there is such a big height difference between the suits and the actors," Chu continues. "And in some cases, Jon wanted to change some of the nuance of performance as well with a hand gesture. Well, Robert is very animated, so sometimes we wanted to tone that down a tiny bit. This gave us that flexibility."
Apparently Whiplash's hand-crafted suit for the final battle was a last minute addition that required 60 new shots to raise the stakes. "It was recognized early enough to make the adjustment," Chu explains. "We utilized the Lidar set of the Japanese Garden, which was shot in LA and we used our own [Imocap] system to postvis the end battle. We had gotten a previs movie from everyone down south (Genndy Tartakovsky designed the Stark Expo chase sequence and prevised the original version of the Japanese Garden battle) and utilized background plates, virtual cameras and used our animators as Imocap standins for Iron Man, War Machine and Whiplash. This enabled us to feel part of the choreography."
Again, this was another instance of ILM's creative input and keeping it real world with director Favreau's demands. And look for the new lighting toolset to be used from here on out at the studio.
The Anatomy of a Disaster Scene in the Movie 2012
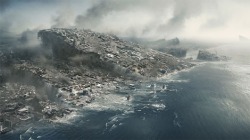
Roland Emmerich is no stranger to cinematic disaster. The director froze New York City in The Day After Tomorrow and blew the White House to bits in Independence Day. So he wasn't sure about directing 2012. The movie is based on the idea that the end of the Mayan calendar on December 21, 2012, portends a global apocalypse. "When I realized how much disaster was involved, I got a case of cold feet because I've done that, you know?" he says. "So I said, 'Okay, I'm going to make this the mother of all disaster movies.'?"
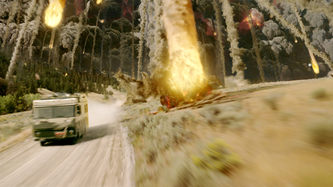
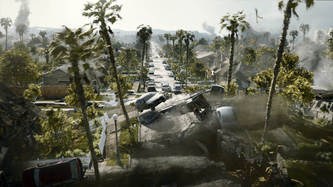
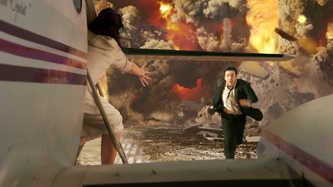
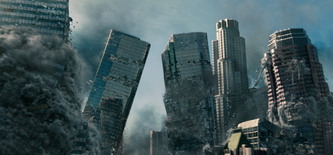
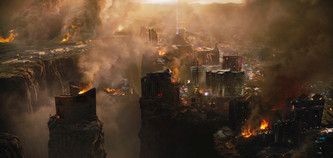
More than 100 artists created 2012's 1300 visual-effects (VFX) shots, including volcanic eruptions, tsunamis, floods—and a massive earthquake that rips California apart. In this three-minute sequence, failed science-fiction writer Jackson Curtis (John Cusack) drives through Los Angeles as the city crumbles around him. In the past, Emmerich might have filmed on location and swapped in CG crumbling buildings, but that approach didn't make sense for 2012 because every edifice had to be destroyed. Instead, artists at the VFX company Uncharted Territory built a 3D photorealistic version of several city blocks using 60,000 high-dynamic images as a reference. Then they made every mailbox, tree and building shake and crumble.
As animators molded the virtual city, Emmerich was filming his actors in front of a blue screen. He put the actors on a "shaky floor," an 8000-square-foot steel platform on airbags. Special-effects coordinators jiggled the bags with pneumatic pumps to inspire authentic reactions from the actors. "It was the most complicated scene we created," Emmerich says. "And it's one of my favorites." Below, Marc Weigert and Volker Engle, co-CEOs of Uncharted Territory and visual-effects supervisors on the new movie, explain how they put the apocalyptic effects together.
#1 STORYBOARD
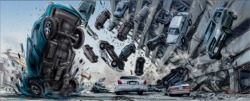
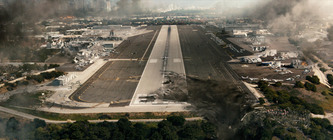
Every sequence in the movie begins as a storyboard, or a rough, comic book–like version of the film's action. This particular sequence, which depicts Curtis Jackson (John Cusack) rescuing his family and driving them to the Santa Monica airport, lasts three minutes and was initially just "15 to 20 quick drawings," says co-VFX supervisor Volker Engle.
#2 PRE-VISUALIZATION
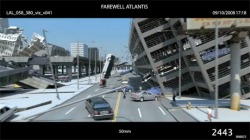
After the storyboards are done, VFX artists move to a stage called pre-visualization. "I describe it as an early form of a CG version of a sequence, with video-game quality [visuals]," Engle says. A crude version of the action, pre-vis includes every part of the scene, up to camera angles and early sound effects. "I think that's really the future of filmmaking," says co-VFX supervisor Marc Weigert. "That almost every movie will be entirely done in the computer first so you can find out if a scene will work before you shoot it. Every shooting day is extremely expensive—about $300,000. So if you can spend fairly little money compared to that to actually build all this first in the computer, edit this, find out whether there is anything you don't even need to shoot because, you know, it doesn't work anyway in the movie."
#3 LIVE ACTION PLATE
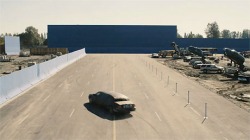
Director Roland Emmerich shoots the limo against a massive blue screen in Vancouver, Canada. The shot, called a live action plate, looks like this before any virtual elements are added; Emmerich filmed the scenes with a Panavision Genesis digital camera
#4 MATCHMOVE
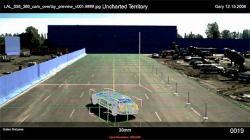
VFX artists identify points in the plate that can be tracked over all frames of the shot. Using that information, software calculates the exact movement of the original live action camera and re-creates that movement inside the computer.
#5 SCENE ASSEMBLY/LAYOUT
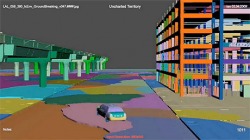
The various elements of scenes, known as assets, are created by many different artists simultaneously. "Even a single asset like an airplane will most likely be created by several artists: a modeler, a rigger, a texture artist and a shading artist," Weigert says. When all the assets are completed, animators assemble the entire set in the computer, just like production artists build a live action set. "As soon as it's assembled, we usually do a test render to make sure all the assets work correctly—that there are no holes left," Weigert says.
#6 SIMULATION (Cars)
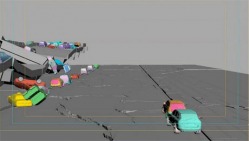
After VFX artists build 3D models of the elements of the scene—cars, parking garages, roads, street lamps and trees—they break them apart. "The 3D model has to be cut apart into pieces based on the different material parameters—this is partly done manually, partly with automated tools," Weigert explains. Animators separate the object into its different parts: metal structure, concrete pillars, glass windows, etc. This way, "glass breaks into shards, while concrete breaks into chunks, and metal bars twist and bend before breaking," Weigert says. "Every material making up an object has different behavior in real life, and we have to simulate that."
#7 SIMULATION (Dust)
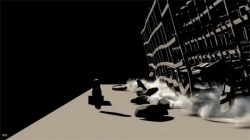
All the pieces and materials go through simulations that are run separately and often interact with each other. "We tell the computer the original state of an object. That means a building, even though already cut into pieces, is intact in the beginning, meaning in the computer it will look like a finished 3D puzzle," Weigert says. "Then, we apply external forces to that object." In the case of this particular sequence, it's an earthquake that shakes the ground, but VFX artists could also apply higher gravity force or strong wind. Based on that external force, the computer makes physically accurate calculations for what will happen to that object. "The pre-cut pieces will break apart from each other, interact with each other and the ground," Weigert says. To animate, artists used 3D Studio Max; for the crumbling buildings, they used a program called Thinking Particles. The custom tools developed by the company that owned Thinking Particles took over a year to develop.
#8 SIMULATION (Parking Garage)
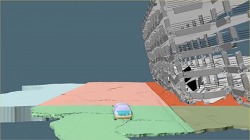
Typically, Weigert says, each material has to be simulated separately. Sometimes, there are simulations on top of simulations. "For example, to break a high-rise building, at first there would be a structural simulation that mimics the behavior of the metal structure of the building and shows how the building moves, leans, and how each floor collapses," he says. "Then, there's a sim based upon the previous one that shows the concrete pillars and floors breaking apart into chunks and falling down. On top of that, there's another sim for the sand-like concrete sulfate that appears when chunks of concrete break apart."
#9 SIMULATION (Parking Garage and Cars)
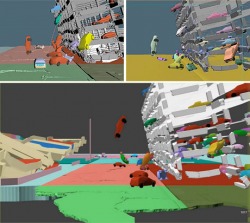
Other types of simulations show cars deforming as they hit the ground or crash into objects, trees swaying or toppling from the shaking ground, asphalt ripping open, lawns and grass moving and ripping apart—what's known as a cloth sim—power lines swaying, power poles falling over, the freeway buckling and crumbling, and on and on. "But, on top of all that," Weigert says, "since a physically accurate simulation isn't necessarily always doing exactly what the director would like to see or what's needed to tell the story of a certain shot, there's a lot of manipulation by the artists necessary to make the objects behave in a way we want them to—which, in movies, is a lot more important than physical accuracy."
#10 RENDER (Background)
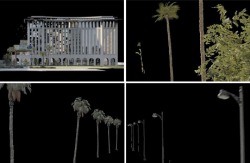
Every layer of the scene must go through a render, which solidifies its appearance for the final shot. "The render passes depend on the complexity of the shot and how much we think we need to manipulate the rendered pieces later, where everything is put together to create the final shot," Weigert says.
#11 RENDER (Freeway and Cars)
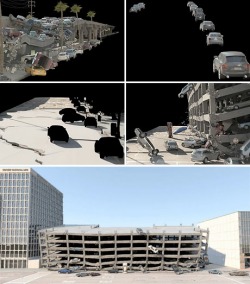
Renders include: diffuse pass for general lighting pass in color; shadow pass; the RGB lighting pass, which shows different light sources as red, green or blue light, so the lighting can be manipulated later in the 2D compositing stage; the spec pass, which has only the specular highlights; reflection pass; a pass for blurry reflections, the soft reflections of color and light from one object onto another; and matte, or holdout, passes, which allow animators to separate objects later in 2D composition and manipulate their color, lighting and positioning.
#12 RENDER (Street)
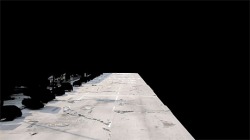
"All of those passes would be rendered for each segment of a shot, meaning the shot itself would be cut up into several pieces, like picture left, right, foreground, background," Weigert says. "This is done to save render time per frame, or to have more control in the compositing stage." According to Weigert, the average render time was 20 hours per frame for all passes. The earthquake sequence has over 7000 frames; the total render time was about 141,120 hours—or 16 years, if it had been rendered on a single machine.
#13 DOUGHBOY RENDER
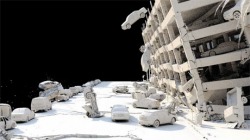
"This is a test render that does not show any textures or colors but shows all lighting, shadows and bounce light and usually has a lot of render settings at lower quality than a final render does," Weigert says. "We use it to make sure the scene assembly and lighting settings all look correct before setting off a full render." Full renders can take anywhere from a few hours to several days—the longest single-frame render in 2012 clocked in at five days—"so we better make sure it comes out right!" Weigert says. A doughboy render, meanwhile, takes just a few minutes per frame.
#14 FINAL SHOT
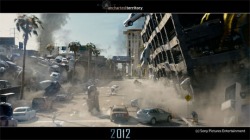
After rendering, the virtual assets and live elements of a scene are composited together on the live action plate, giving the appearance of a single shot that has been photographed live.
3D FX—But Not Cameras—Makes a Rich, New Alice in Wonderland
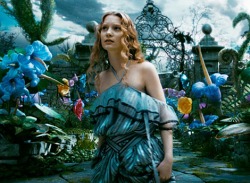
If there's any filmed world that's made for 3D, it's Wonderland. PM talks to Alice in Wonderland's visual effects supervisor, Ken Ralston, to find out how he and Tim Burton created an immersive 3D world—without using stereoscopic cameras.
When Alice takes her tumble down the rabbit hole in Tim Burton's latest movie, Alice in Wonderland, audiences will feel like they're falling with her, thanks to expertly rendered 3D. And if there's any place that's made for the format, it's Wonderland. "In [this] world—the shrinking and the growing and the spatial stuff—3D helps," Burton told reporters at last year's Comic Con. "It enhances the experience."
Unlike megablockbuster Avatar, Alice wasn't filmed with a stereoscopic camera rig; instead, it was shot with traditional cameras and converted after the fact. This is because Burton felt it would be less time-consuming given the film's potpourri of effects—manipulated live action (the Red Queen's bulbous head), rotoscoping (the Red Knave's movement) and completely computer-generated characters and backgrounds. Instead, a team at Sony Imageworks headed by visual-effects supervisor Ken Ralston was tasked with creating the three-dimensional Wonderland. "What helps the audience feel as if Alice is in this world is part of that false sense of depth, the spacial relationship to what she's running around in," Ralston says. "When she's in a mushroom forest heading for a caterpillar, 3D is one more way of making you feel as if she is standing out there with the Tweedles, with the Caterpillar and the smoke wafting around. It seemed to be a natural fit. We weren't forcing the 3D down anyone's throat; it really helps you feel as if you are in Wonderland."
While in Wonderland—or Underland, as it's called in the film—Alice is constantly changing size, shrinking to fit through a tiny door and growing into a giant to impress the bossy Red Queen, whose huge head leads her to love anything larger than life. Filmmakers used the 3D to enhance the effect, putting the camera down low as she grew taller and shooting from above to show the sheer size of the things around her as she shrank. "There are so many scale changes where she's 6 inches or 2 feet tall or giant," Ralston says. "3D was beautiful for those shots."
Sometimes, visual-effects artists manipulated the 3D to make the audience feel what Alice was experiencing. When Alice teeters on the edge of crumbling ruins while facing off against the jaw-snapping Jabberwocky (modeled after some of Ray Harryhausen's stop-motion work), the camera shows her point of view—straight down—and you're right there with her. When Alice is trapped in a teacup, you feel that, too. "If Alice was trapped, we made sure the depth was more compressed," Ralston says. "Or if it was a big, wide scene, then we let you feel a little more of the distance there. You can do a lot of that stuff with 3D."
And then there are shots reminiscent of old stereoscopic films, where objects fly off the screen toward the viewer. While most filmmakers believe that such effects are gimmicks, preferring to make the experience more immersive and less intrusive, Ralston says they wanted those shots in the film. "In fact, in the beginning Tim was probably thinking we'd do less silly stuff," Ralston says. "And then we ended up doing Red Knights poking spears at the lens. We wanted to have more fun with it. When we grew up, there wasn't much 3D, but what was done was so silly, and this is an homage to those movies."
But making a stereoscopic film came with its own set of challenges. "As hard as you push 3D, it can never be too extreme or your eyes get pulled out of your head," Ralston says. Making settings for interaxial distance—the space between the two cameras that represent the human eyes and create the illusion of depth—too intense can lead to an uncomfortable experience for the viewer. A good example of extreme depth done well in the film, Ralston says, "is the shot where you're looking at a dew drop on a mushroom, and you can see the upside down reflection of the Tweedles and Alice walking towards the Dodo Bird. The camera drops down from that and we see them behind it. That was an extreme depth."
Even placing digital elements too close to the camera can look odd to the audience. "There are so many things you have to look out for while doing this so it doesn't look funny," Ralston says. "Small things on the edge of the frame can work better in 3D than a big object—that can look very strange. And until you see it you're not quite sure why. Some of those considerations came into play in terms of what we could have in the foregrounds and backgrounds."
While he acknowledges that working in 3D was tough—and created a lot more work for the VFX artists—Ralston is thrilled with the result. "It worked a lot better than we thought it would," he says. "It's just one more great tool if you can use it right. I enjoyed using it. Creatively, 3D was a great thing to have."
The Force Is Strong with Industrial Light & Magic (ILM) After 35 Years of Special Effects
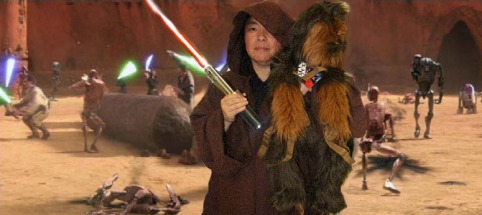
Over the last 35 years ILM have won 15 Oscars for special effects on some of the biggest grossing movie franchises of all time including Star Wars, Star Trek, Terminator, Back to the Future and Harry Potter. When it comes to wowing audiences with technical wizardry and spectacular visual artistic creation, ILM have been at the forefront for three and half decades.
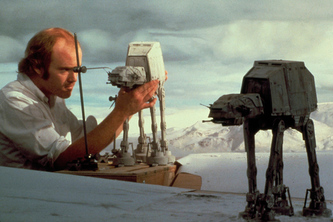
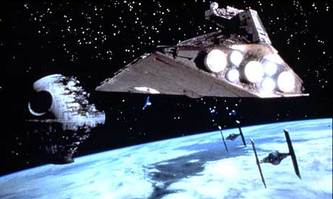
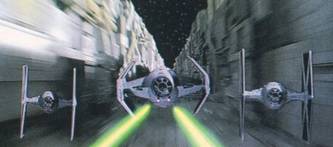
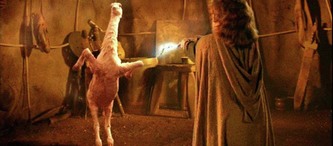
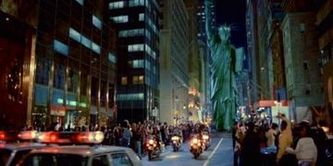
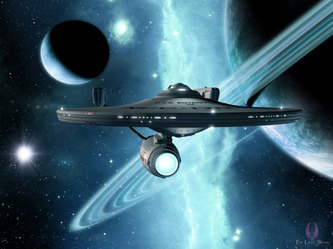
George Lucas’ space epic is where Industrial Light & Magic all started. Under the leadership of John Dykstra a small but talented team of artists, engineers and enthusiastic geeks came together to form the Special Visual Effects team on Star Wars. Their use of motion control camera to film the trench sequence on the Death Star was a first for visual effects and was the beginning of celluloid legend. Five years after the conclusion of the original Star Wars trilogy and having worked on projects like E.T., Star Trek and Labyrinth ILM was challenged by Lucas with his dwarf fantasy Willow. The special effects pushed the boundaries of digital morphing when Willow uses magic to turn the great sorceress Raziel back into her human form. Ghostbusters 2 was mesmerising for its size and scale of special effects. The combination of techniques used to make fantastical ghosts like Slimer seem real, as well as creating a walking Statue of Liberty to crunch down the streets of New York made ILM the people you were gonna call if you needed special effects doing.
George Lucas’ space epic is where Industrial Light & Magic all started. Under the leadership of John Dykstra a small but talented team of artists, engineers and enthusiastic geeks came together to form the Special Visual Effects team on Star Wars. Their use of motion control camera to film the trench sequence on the Death Star was a first for visual effects and was the beginning of celluloid legend. Five years after the conclusion of the original Star Wars trilogy and having worked on projects like E.T., Star Trek and Labyrinth ILM was challenged by Lucas with his dwarf fantasy Willow. The special effects pushed the boundaries of digital morphing when Willow uses magic to turn the great sorceress Raziel back into her human form. Ghostbusters 2 was mesmerising for its size and scale of special effects. The combination of techniques used to make fantastical ghosts like Slimer seem real, as well as creating a walking Statue of Liberty to crunch down the streets of New York made ILM the people you were gonna call if you needed special effects doing.
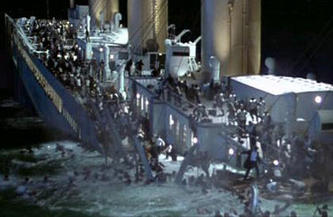
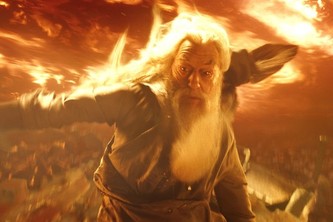
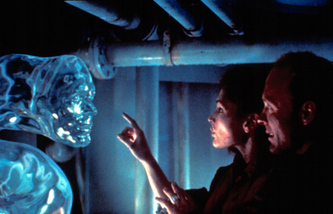
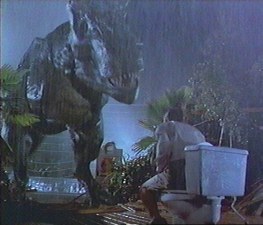
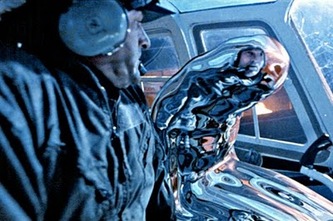
Buoyed by the success of Willow, ILM started pioneering the use of computer-generated imagery (CGI) in 3D. Previous CG sequences had been completed by ILM on Star Trek II: Wrath of Khan but The Abyss was a real milestone in 3D CGI as the amorphous pseudopodium came to life. After Star Wars, T2 is often considered the landmark moment not just for ILM but for special effects as an industry. The T-1000 was the first main character to be partially computer generated, and perfecting the techniques that had been used on The Abyss, ILM created an unstoppable machine of visual perfection. The scene where the T-1000 reforms after being shattered remains one of the most iconic moments of 20th Century film. Steven Spielberg’s Jurassic Park took a huge leap forward for animated animals, beautifully mixing CG models with huge animatronic rigs. The visual impression of dinosaurs roaming the park was breathtaking, and the T-Rex set audiences suitably on edge with its raw visceral power. Whilst ILM have made their name by creating the fantastical and ultra technologically advanced, the work done on James Cameron’s Titanic was a break from the norm, creating a gritty and realistic historical event. The CG work was exceptional, painting a dramatic and horrific account of the sinking superliner. JK Rowling’s Harry Potter franchise officially became the most successful box-office movie franchise in 2009 when Harry Potter and the Half-Blood Prince pushed the Potter franchise above James Bond. ILM’s witchcraft and wizardry cast a confundus charm on audiences, dazzling and entertaining them with their magic.
The excitement of seeing live action robots in disguise made Transformers the summer blockbuster of 2007. ILM were the team behind Optimus Prime, Bumblebee, Megatron and the rest of the Transformers in jaw-dropping visual orgasms of robot war. The third Transformers movie may be without Megan Fox, but ILM continues their work for Michael Bay. The highest grossing movie of all time, Avatar represents the next revolution in ILM’s history by being the first film to maximise the potential of 3D cinema in a box office smash. Three Oscars, Two Golden Globes and $2.7 billion later, Avatar is the pinnacle of ILM’s achievement’s to date, with more 3D excitement in the pipeline. Currently, ILM is working on post-production for M. Night Shyamalan's Avatar: The Last Airbender, spending tedious time creating the film’s visual effects-laden world.
ILM Behind the Scenes: The Making of Avatar: The Last Airbender
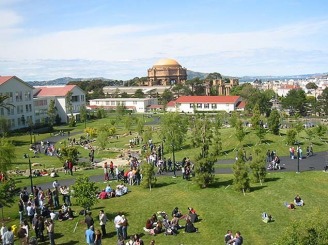
On the outside, Industrial Light & Magic seems like a fairly typical large organization, and one might even confuse it for a college campus. However, once inside, you will discover that ILM is a movie geek wonderland full movie memorabilia. The company feels more like a museum detailing the history of visual effects than a work place. Scattered throughout the halls–all of which are fully decked with vintage posters of films that the company has worked on–are a variety of original props, models and artwork, ranging from the Vigo painting in Ghostbusters II to a full-scale Velociraptor from Jurassic Park. Today, ILM’s San Francisco-based headquarters is finishing up on post-production for M. Night Shyamalan's Avatar: The Last Airbender, giving film enthusiasts some insight into the work that goes into creating a film loaded with cutting edge visual effects.
Elemental FX
Considering how notoriously awful CGI fire and water has been in the past, it’s astonishing how beautifully and believably rendered they are in The Last Airbender. According to the film’s tech department (Craig Hammack - Associate VFX Supe, and Daniel Pearson - Digital Production Supe), the look of the fire was one of M. Night’s main concerns. He was aware of how fake digitally-created fire usually looks, and because these are films where digital fire is a necessity, a lot of time was spent perfecting how the fire would play on-screen.
Another of M. Night’s concerns was that he didn’t want to venture too far into fantasy. In the series, the fire benders are the sole group that can generate their respective element without an originating source. In a bid to keep the show more grounded in reality, M. Night altered the shows mythology so that the fire benders would no longer be able to create fire from nothing. Air bending, meanwhile, posed a very different problem. Since air exists everywhere but isn’t explicitly visible, there was a question of how much the audience should see. Ultimately, ILM went for a “gaseous air look”, and put more emphasis on how the air bending would affect the location around it. So if an area were particularly dusty, the air bending effect would be conveyed more through the way the dust is picked up off the ground than the actual air itself. With all of the natural elements, the common theme throughout the film was that they should always feel like an extension of the actor/character. When Katara is practicing with water bending early on, she’s still inexperienced, so a water ball she creates is sloppy and drips around the edges. M. Night was very committed to the idea that the bending abilities are a part of the character, and it was important for the animators to stay true to that by using the actor’s performance to measure how the bending effects would appear.
Action Sequences
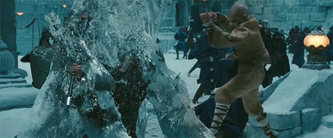
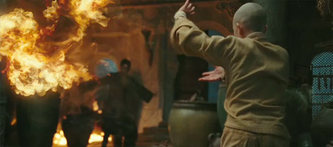
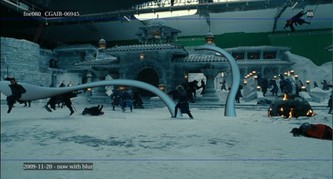
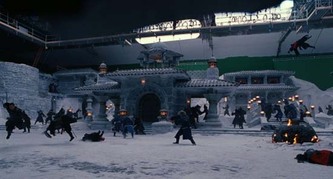
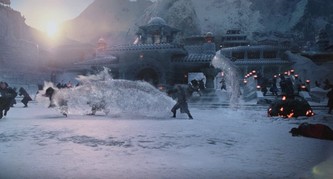
Almost all of the action beats in The Last Airbender are taken from single-shot sequences. Take the above image, for example. That shot doesn’t begin and end with Aang flipping over and freezing the guy. The actual scene is closer to a minute long, and it consists of one continuous take of Aang using both of his air and water abilities to blast through, dodge under, and disable the swarm of enemies surrounding him. All of the action scenes are like this, and they are fantastically choreographed fight sequences.
Almost all of the action beats in The Last Airbender are taken from single-shot sequences. Take the above image, for example. That shot doesn’t begin and end with Aang flipping over and freezing the guy. The actual scene is closer to a minute long, and it consists of one continuous take of Aang using both of his air and water abilities to blast through, dodge under, and disable the swarm of enemies surrounding him. All of the action scenes are like this, and they are fantastically choreographed fight sequences.
Appa, Momo and Other Creatures
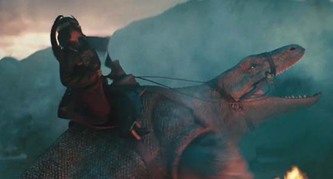
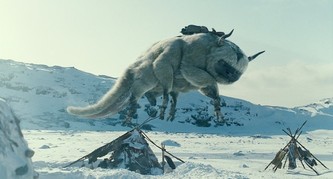
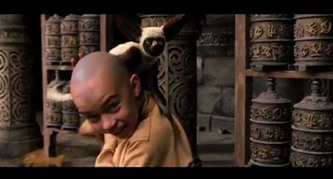
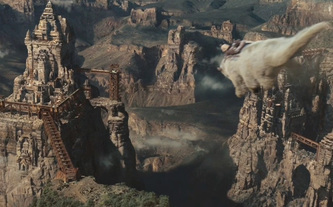
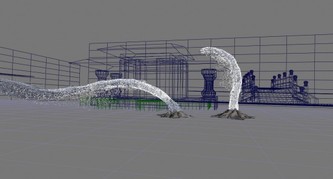
Avatar: The Last Airbender's has a wide array of beloved characters such as Momo who looks almost exactly like a real lemur, or at least as close as you can get with CGI. The animation department (Tim Harrington - Animation Supe) explained how they worked out the mechanics of Momo’s flight using a Giant Fruit Bat, and decided to conceal his wings when not in use by having them fold up under his arms. As for Appa, Harrington says he envisioned him as kind of a combination of Chewbacca and the Millennium Falcon. “He’s this hairy sidekick, but he’s also the kids’ ride from location to location.” For his design, they opted for polar bears, elephants and bison as reference points, but decided to steer away from using bison and cows for the face since they didn’t want to make Appa look like he’s dumb. Instead, they tried to find a comfortable balance between animal and human, basing his facial appearance off primates. Other creatures in the film include Avatar Roku’s Spirit Dragon, the Komodo Rhinos, and a Koi Fish. For the Spirit Dragon, which guides Aang in the spirit world, they went for a serpentine approach, favoring Eastern flair over a strictly traditional Chinese dragon. As for the Komodo Rhinos, which the Fire Nation use to climb up walls when riding into battle, they tried to capture the unruly walk of a bulldog.
Avatar: The Last Airbender's has a wide array of beloved characters such as Momo who looks almost exactly like a real lemur, or at least as close as you can get with CGI. The animation department (Tim Harrington - Animation Supe) explained how they worked out the mechanics of Momo’s flight using a Giant Fruit Bat, and decided to conceal his wings when not in use by having them fold up under his arms. As for Appa, Harrington says he envisioned him as kind of a combination of Chewbacca and the Millennium Falcon. “He’s this hairy sidekick, but he’s also the kids’ ride from location to location.” For his design, they opted for polar bears, elephants and bison as reference points, but decided to steer away from using bison and cows for the face since they didn’t want to make Appa look like he’s dumb. Instead, they tried to find a comfortable balance between animal and human, basing his facial appearance off primates. Other creatures in the film include Avatar Roku’s Spirit Dragon, the Komodo Rhinos, and a Koi Fish. For the Spirit Dragon, which guides Aang in the spirit world, they went for a serpentine approach, favoring Eastern flair over a strictly traditional Chinese dragon. As for the Komodo Rhinos, which the Fire Nation use to climb up walls when riding into battle, they tried to capture the unruly walk of a bulldog.
Environmental Design
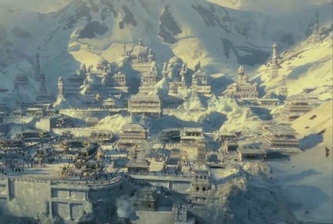
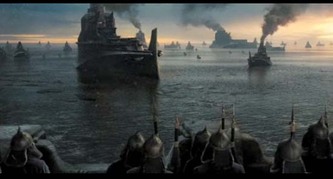
As with everything in The Last Airbender, great attention was paid to basing the world in reality as much as possible, and this is especially true of the landscapes featured in the film. Real world temples from India and China were photographed and used as a base for the air temples, which were then set atop unreachable rock landscapes. The film’s art department (Christian Alzmann - Art Director, Barry Williams - Digital Matte Artist) explained how M. Night always used the word “masculine” when describing what the environments should look like, and that they should have a dark, realistic edge. “He was always pushing us to make it a little more ominous.” When presented with a concept visualization of one of the background shots, M. Night decided to limit the CGI spectacle of it in favor of a much more toned down look, as to not distract from the emotional state of the characters. It was important that the environments and locations be visually compelling, as with the industrial style of the Fire Nation’s ships, but they should always be at the service of what the characters are feeling.
As with everything in The Last Airbender, great attention was paid to basing the world in reality as much as possible, and this is especially true of the landscapes featured in the film. Real world temples from India and China were photographed and used as a base for the air temples, which were then set atop unreachable rock landscapes. The film’s art department (Christian Alzmann - Art Director, Barry Williams - Digital Matte Artist) explained how M. Night always used the word “masculine” when describing what the environments should look like, and that they should have a dark, realistic edge. “He was always pushing us to make it a little more ominous.” When presented with a concept visualization of one of the background shots, M. Night decided to limit the CGI spectacle of it in favor of a much more toned down look, as to not distract from the emotional state of the characters. It was important that the environments and locations be visually compelling, as with the industrial style of the Fire Nation’s ships, but they should always be at the service of what the characters are feeling.
